How to Fix an LED Light Strip Connector: A Guide
Flickering lights, dim sections, or complete failure are common signs of a faulty LED light strip connector.
These issues often come from poor contact, incorrect polarity, or damaged connectors. When connections are not secure, LED strip lights cannot perform safely or efficiently.
Fixing these problems is simple with the correct method. This guide explains how to fix LED light strip connectors using both solderless options and soldering techniques.
Understanding LED Light Strip Connectors
LED light strip connectors come in two main types: solderless and soldered.
Solderless connectors are simple to use and require no special tools, making them the ideal choice for quick fixes or temporary setups. These connectors snap onto the strip, allowing users to connect LED light strips in seconds.
On the other hand, soldered connections take more time but offer a stronger and more reliable link. They are better suited for permanent installations where secure contact and long-term durability matter.
Overall, choosing the right connector depends on the project’s needs, power stability, and installation time.
Common Issues with LED Strip Connectors
Several problems can affect LED strip lights if the connectors are not installed or maintained correctly. Below are the most common issues that lead to lighting failures or poor performance:
Loose or Poor Connections
A loose LED strip connector can disrupt the power supply and impact the performance of the wiring project. Loose or poor connections are often the result of installation errors, such as uneven force or poor alignment.
When your LED connections are loose or poorly connected, there may be power supply interruptions. In some cases, poor contact may also cause flickering, sections not lighting up, or colors appearing incorrectly.
Using wire nut kits can help in securing solid wire-to-wire contact when dealing with multiple strips. Additionally, ensure that connectors are clipped tightly and the wire is fully seated to prevent intermittent failures.
Incorrect Polarity
LED strip lights rely on proper polarity to work. Reversing the positive and negative terminals will prevent the strip from lighting up.
This is a common mistake when connecting RGB strip lights or cutting and reconnecting one strip to another.
Check the markings on the strip and connector before installation. The black wire typically represents the negative line, while red or another color indicates the positive line.
When in doubt, test the setup with a multimeter before final installation to ensure accuracy.
Using waterproof wire connectors can also help preserve correct polarity in outdoor or high-humidity environments.
Overheating Connectors
Overheating is a serious issue that can occur when connectors are not rated for the LED strip’s voltage or current. This can cause plastic housings to melt, damage the circuit board, or create a short circuit.
Additionally, heat buildup can also reduce the lifespan of the LEDs, which is why it is essential to always check the current rating of the connection before installation. Other than that, you may use thicker wires and strong contact points for higher power loads.
If soldering is needed, tools like heat guns for soldering ensure safe and controlled heat application. This prevents localized damage and improves long-term safety.
Tools and Materials Needed
Having the right tools makes it easier to fix an LED light strip connector correctly. Below is a list of tools and materials you may need, along with their purpose:
Replacement Connectors: Used to reconnect or replace damaged LED strip connectors.
Soldering Iron and Solder: Needed for creating permanent connections when soldering is required.
Wire Strippers: Used to remove insulation from wires before connecting or soldering.
Heat Shrink Tubing: Provides insulation and strain relief for soldered connections.
Multimeter: Helps test continuity and confirm that voltage is reaching the strip.
Isopropyl Alcohol and Cloth: Used to clean contact points and remove oxidation or debris.
Step-by-Step Guide to Fixing LED Strip Connectors
Fixing a faulty LED strip connector does not take long with the right tools and method. Follow the steps below to restore proper function and avoid further damage.
Step 1: Identify the Problem
Begin by inspecting the LED strip for signs of wear or damage.
Check the connector and the copper pads near the cut line for burnt marks, loose contact, or discoloration. If the strip lights flicker or stay off, the issue may be in the connection or circuit.
Use a multimeter to test for continuity across each section. If one strip shows no reading, the line may be broken.
Also, test the power supply to confirm it is delivering the correct voltage. This simple check can help isolate whether the fault lies in the strip, connector, or power source.
Step 2: Clean the Contacts
Before reconnecting or replacing anything, clean the contact points. Dirt, oxidation, or adhesive residue can block electrical flow.
Dip a cotton swab in isopropyl alcohol and gently clean the exposed copper pads on the LED strip. Wipe the inside contact area of the connector as well.
Make sure both surfaces are completely dry before reconnecting.
A clean contact ensures full conductivity and reduces the chance of weak signals. This step is especially useful if you plan to use wire connectors or butt connectors, as dirty surfaces can affect grip and performance.
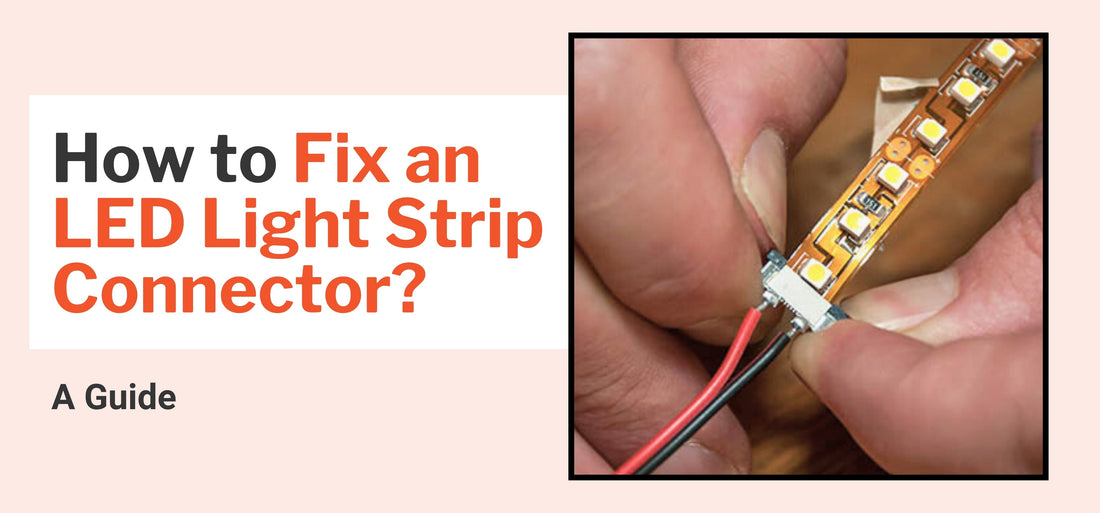
Step 3: Reconnect Using a Solderless Connector
Place the LED strip into the solderless connector, aligning the copper pads with the connector’s metal prongs.
Most connectors clearly mark the positive and negative ends, so ensure the polarity is correct. Misalignment can prevent the strip from turning on.
Once aligned, press the connector closed firmly. Apply even pressure until the locking tab clicks into place. This creates a solid connection for the circuit.
If you need to join separate segments, butt connectors offer a fast and clean solution for joining wires without solder. These are useful for straight runs or bridging gaps between LED segments.
Step 4: Opt for Soldering (If Necessary)
For a permanent fix, soldering is often the best solution.
Start by cutting back any damaged sections to expose a fresh part of the strip. Use scissors to make a clean cut along the marked line. Strip a small section of insulation to reveal fresh copper pads.
Tin both the copper pads and the wire tips using a soldering iron. This prepares them for a smooth bond. Carefully solder the wires to their corresponding pads, ensuring the positive and negative terminals are matched.
After soldering, slide heat shrink tubing over the joints and apply heat using a wire crimping tool or ring terminals for strain relief and insulation. This method ensures a strong, lasting connection.
Tips for Preventing Future Issues
To keep your LED strip lights working reliably, it is important to install them with care.
Avoid bending the strip sharply near the connectors. A tight bend can stress the connection points, leading to cracks or intermittent contact. Use gradual curves instead of sharp corners to protect the circuit board and contacts.
Always check that your connectors are rated for the current of your LED strip. Underrated connectors can overheat and fail over time. For better stability in high-vibration areas, soldering the wires is often a better option.
If you are using terminals in your project, spade connectors and a fork connector kit provide secure and organized connections. For permanent fixes, combine them with wire eyelet connectors and strain relief methods, such as heat shrink tubing.
All in all, proper installation and material selection help reduce the chance of failure and extend the life of your light strips.
Frequently Asked Questions (FAQs)
Here are clear answers to common questions about fixing LED strip connectors:
Why Is My LED Strip Connector Not Working?
Your LED strip connector may not be working due to loose contact, reversed polarity, or the incorrect use of a connector type. A weak connection can prevent power from reaching the LEDs, resulting in flickering or complete failure.
Check that the strip is fully inserted and the pins align with the copper pads. Also, ensure the connector matches the LED strip's size and voltage.
Inspect the connection point for damage and confirm polarity by matching the positive and negative terminals correctly.
Can I Fix a Broken LED Strip Without Soldering?
Yes, you can fix a broken LED strip without soldering by using solderless connectors. These are quick to install and require no special tools.
Align the copper pads with the connector pins, secure the connection, and then plug the strip into a functioning power supply.
While this solution is convenient, it may not withstand high-vibration environments well. For long-term reliability or outdoor setups, it is recommended to solder the wires and protect them with heat shrink tubing.
How Do I Know If My LED Strip Connector Is Faulty?
You can tell your connector is faulty if the lights flicker, show the wrong color, or some sections do not turn on. These are signs that power is not flowing evenly through the strip.
Check the connection point for misalignment or poor contact. A connector that feels loose or does not fully close can also indicate a problem.
Use a multimeter to test continuity and confirm whether the connector allows current to pass through. If it still does not work after quick fixes, replacing it may be the best solution.
Key Takeaways on How to Fix LED Light Strip Connectors
Proper connections are essential for the safe and long-lasting performance of LED strip lights. Faulty connectors can cause flickering, color issues, or complete system failure.
Identifying the issue early and using the correct method—whether solderless or soldered—can quickly restore full function.
Follow the steps in this guide to check your connections, clean contact points, and select the most suitable fix for your setup. For permanent results, soldering is often the more reliable option.
For trusted tools, connectors, and accessories, visit SolderStick to find everything you need for a clean and secure installation.