![]() 4.6 Stars | 5000+ Reviews
4.6 Stars | 5000+ Reviews

Sale: Live for 24 Hours |
![]() Stock: 87 Kits Left
Stock: 87 Kits Left

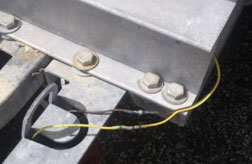
IP67 Waterproof

Sealed Performance

Weather Resistance
Selling Fast: 43 Kits Sold In Last Hour

Free Worldwide Shipping

30 Day Money Back Guarantee

24/7 Customer Support
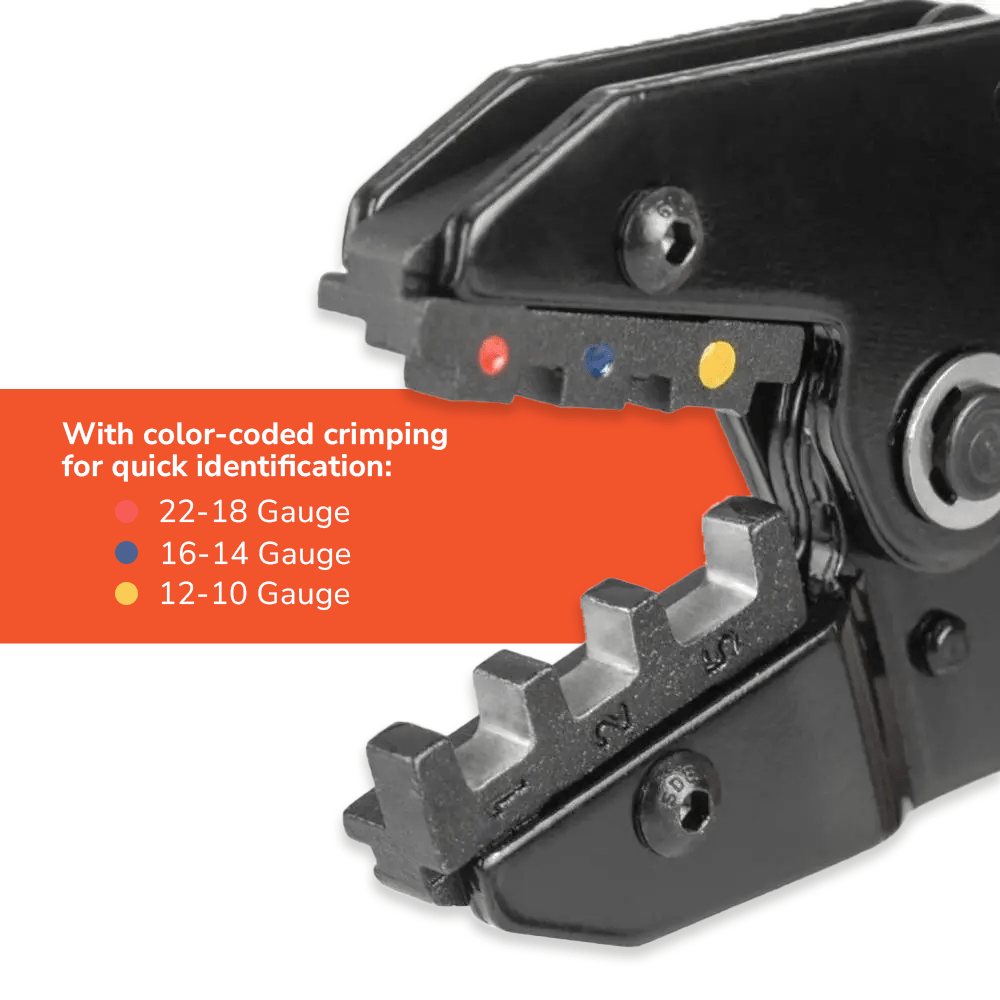
 Versatile Crimping Options: From various terminals to connectors, this tool handles them all with precision.
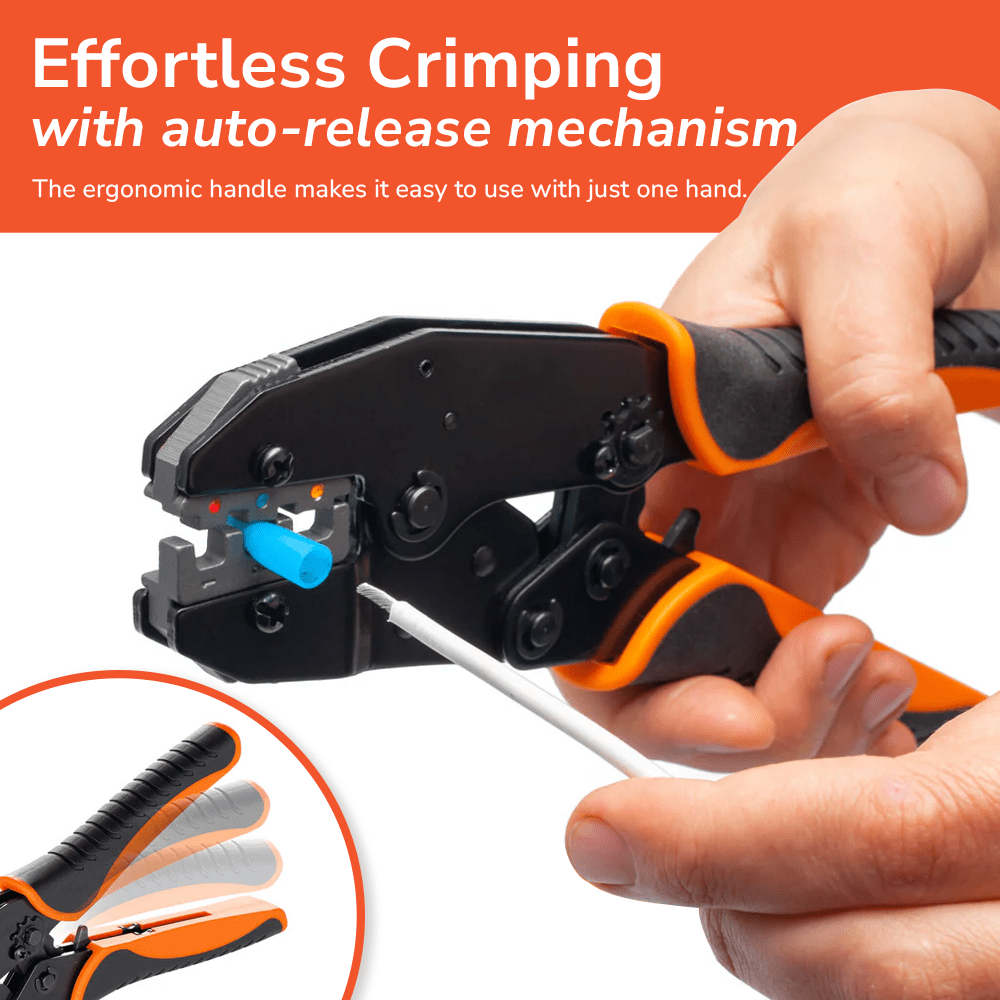
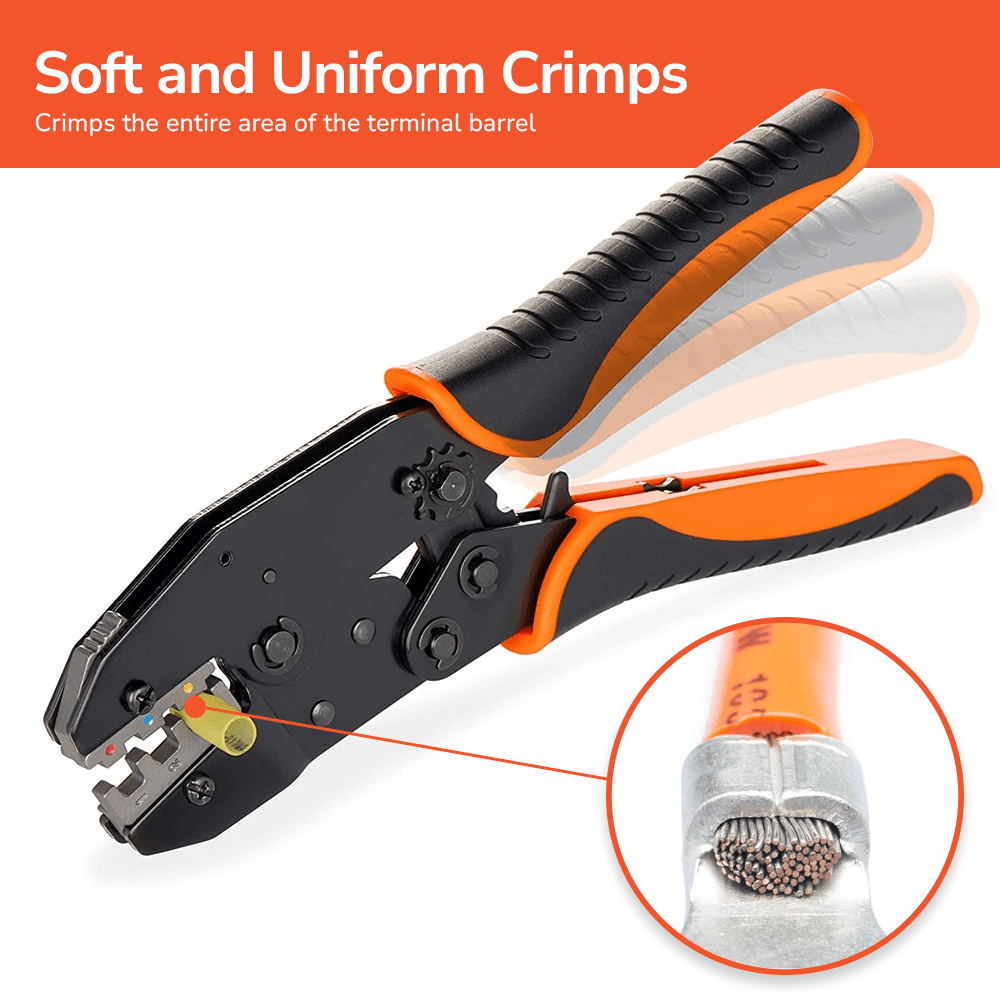
Consistent, Flawless Crimps: Its precise ratcheting mechanism, ensures optimal electrical connections.
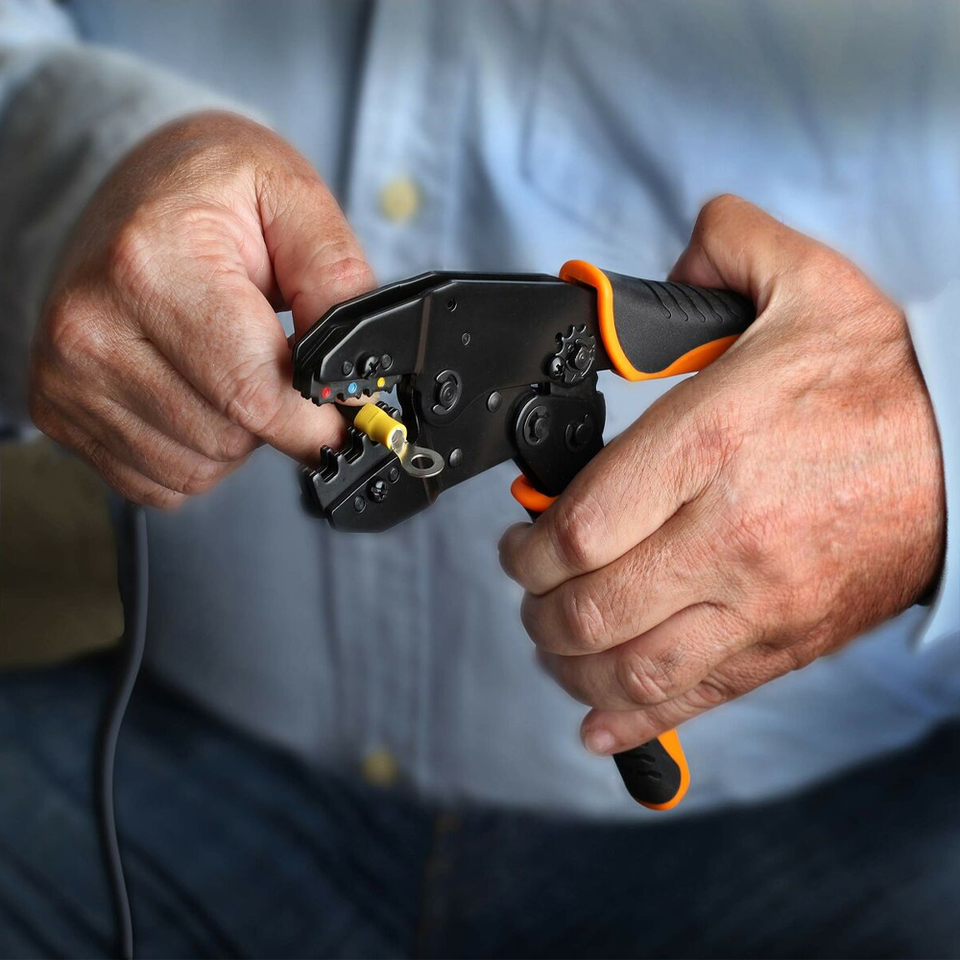
Effortless Operation: Crafted with a professional-grade crimping mechanism to prevent fatigue, even after all-day use.
Quick Die Swapping: Swap crimping dies in seconds, streamlining your workflow.
Multi-Purpose Tool: Ideal for SolderStick connectors, heat-shrink tubing, paint drying, and more.
Versatile Crimping Options: From various terminals to connectors, this tool handles them all with precision.
Consistent, Flawless Crimps: Its precise ratcheting mechanism, ensures optimal electrical connections.
Effortless Operation: Crafted with a professional-grade crimping mechanism to prevent fatigue, even after all-day use.
Quick Die Swapping: Swap crimping dies in seconds, streamlining your workflow.
Multi-Purpose Tool: Ideal for SolderStick connectors, heat-shrink tubing, paint drying, and more.
Don't take our word for it, see what our customers have to say!


Main Features of Solderstick Crimping tools
1
Interchangeable Dies

Well Polished Dies
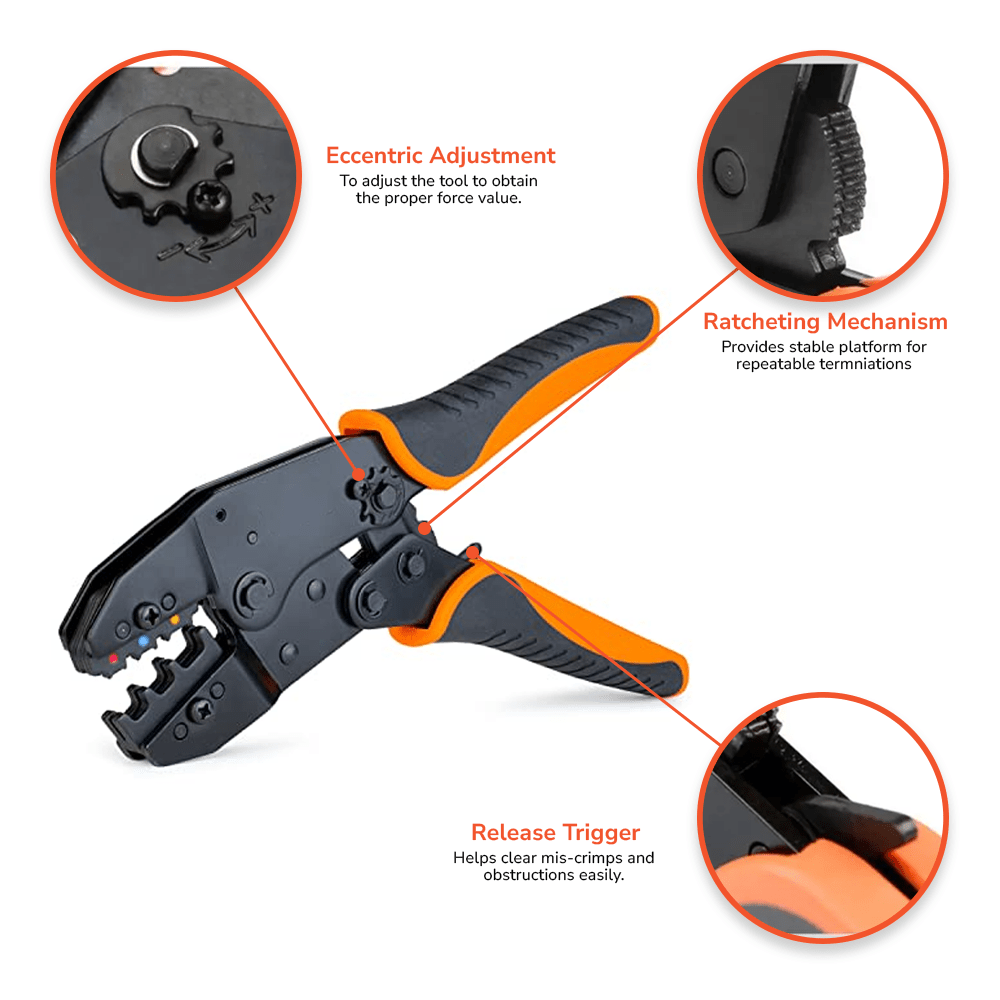
2
High Quality Steel

Guarantees durability and reliability for long-term use.
3
Ratcheting Mechanism

Consistent, controlled crimping.
4
Ergonomic Grip

Comfortable, secure handling.
A Crimping Tool for Every Need
With a comprehensive selection of interchangeable dies tailored to accommodate various connectors and terminals, streamline your workflow without sacrificing precision.
From heat shrink connectors to nylon connectors, non-insulated terminals and ferrule terminals, each crimp is executed with exacting accuracy. Bid farewell to the need for multiple tools – our all-encompassing solution ensures a clutter-free workspace and cost-effective operations. Upgrade your toolkit today and empower yourself to tackle any projects.
Recommended By
Experts, Pros & DIYers
Our products are backed and used by professionals all around the world.

Robby Layton

The Bearded Mechanic

Born Again Boating
Robby Layton ![]() 343K Subscribers
343K Subscribers

The Bearded Mechanic ![]() 414K Subscribers
414K Subscribers

Born Again Boating![]() 244K Subscribers
244K Subscribers

Find Out Why 50,000 CustomersLove SolderStick
Gabriel
![]() Verified Buyer
Verified Buyer
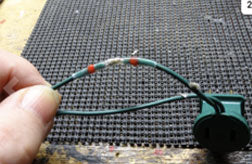
Using a heat gun they provided and it was super easy to slip it on, twist the wires and slip it back on to solder and seal in one swoop is wicked cool! Very happy! Gave them
William
![]() Verified Buyer
Verified Buyer
Work excellent! Seal AND solder wires together! I just hit them for about 15 seconds with my heat gun till shrink tube shrunk then solder melted to wire leads...boom, done!
Brad
![]() Verified Buyer
Verified Buyer
This solder sleeve works exactly how it is described & kills two birds with one stone of soldering wire as well as sealing the connection. It is a huge time-saver.
Kevin
![]() Verified Buyer
Verified Buyer
After about 5 seconds the rubber material started to shrink. At about 9 seconds the solder started to melt & bond the wires. I gave the wires a firm tug & there were super tight.
Frequently Asked Questions
Yes, our wire crimping tool is designed to handle both solid and flexible conductors, providing versatility for various applications.
Yes, our wire crimping tool is equipped with a precise ratcheting mechanism that ensures uniform crimps every time. It is also adjustable to meet different crimping needs.
The jaws are made of high-quality carbon steel, ensuring durability and reliability for long-term use.
Yes, you can confidently use this tool for various automotive wiring repairs and installations.
Our shipping typically takes 3-5 business days in the USA and 7-10 business days in other parts of the world.
If you are not completely satisfied, we are here to make it right.
We stand behind our products with a 90-day money-back guarantee.
Plus, our customer support team is always ready to assist with any questions or concerns.
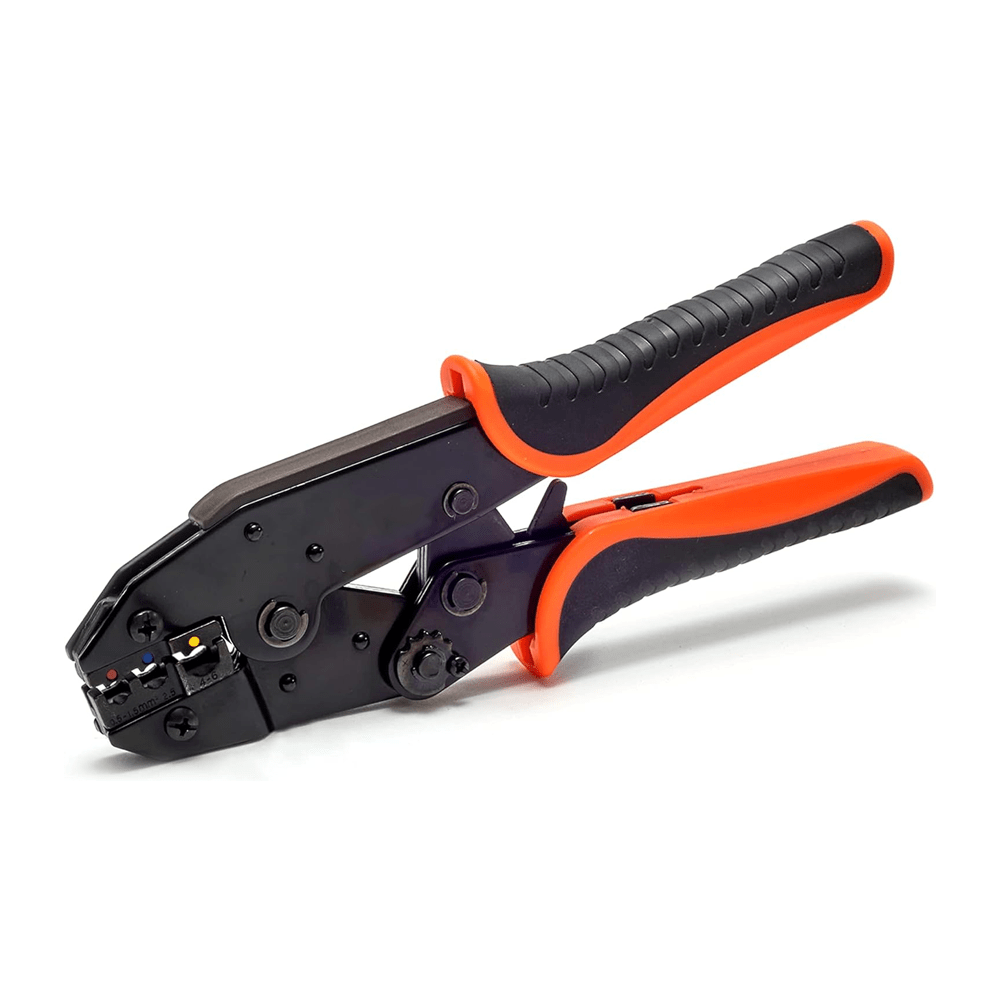
The SolderStick Wire Crimping Tool is engineered to deliver secure, professional-grade wire connections.
Compatible with a broad range of insulated and non-insulated connectors, this tool is an essential addition to any toolkit.
The SolderStick Wire Crimping Tool is packed with features that simplify your crimping job and ensure lasting performance:
Precision Crimping Dies: Designed specifically for crimping connectors during installation and electrical work.
Durable Ratchet Mechanism: Provides consistent pressure for secure, high-quality crimps.
Ergonomic Handle: Offers comfort during extended projects, reducing hand strain.
Versatile Compatibility: Works seamlessly with various types of insulated and non-insulated connectors.
High-Quality Steel Construction: Built to withstand rigorous use, ensuring long-lasting durability.
Attaching Connectors: Securely fasten connectors to electrical wires.
Custom Wiring Harnesses: Ideal for automotive, industrial, and DIY wiring projects.
Electrical Repairs: Efficiently maintain and repair electrical systems.
Crimping Terminals: Achieve strong, consistent crimps in electronic assemblies.
Networking & Telecommunications: Provides reliable connections for networking cables.
Audio/Video Installations: Simplifies connector installation or replacement in audio and video equipment.
Whether you're looking to buy a new tool or upgrade your set of crimping tools, the SolderStick Wire Crimping Tool is designed to make your job easier while delivering professional results every time.
Here are some more SolderStick products you can check out:
T-Tap Wire Connectors | Waterproof Wire Connectors | Heat Guns for Soldering | Wire Nut Kits | Wire Connectors | Butt Connectors | Ring Terminals | LED Connector | Wire Crimping Tool | Wire Eyelet Connectors | Fork Connector Kit | Spade Connectors | Copper Cable Lug | Push-In Terminal Block Wire Connector | Piggyback Space Connector Kit | Colored Heat Shrink Tubing | Bullet Wire Connector | Ferrule Connector Kit


 30 Day Money Back Guarantee


