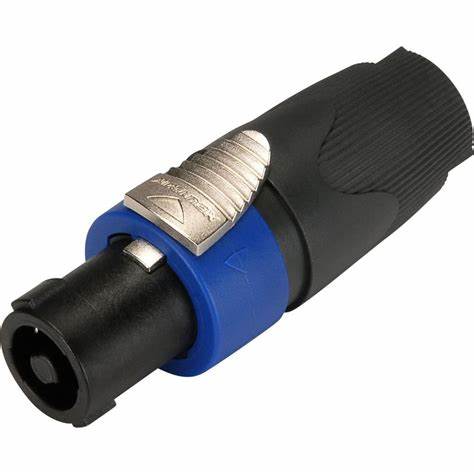
How to Set Up the Speakon Connector Guide
For setting your own loudspeakers to amplifiers, you need a Speakon connector. Just like the other connectors, setting up the Speakon connectors isn’t challenging if you know the entire process. This is what we have for you in this article:
WHAT IS A SPEAKON CONNECTOR?
The speakon connector is an audio cable connector designed to improve the security and performance of high-current professional audio systems.
Speakon is a trademarked name for a specific electrical connector. These ones are specifically made by Neutrik. Known for their high current acceptability, you can expect these connectors to bear a 30 A RMS continuous current and inductive load environment. They come with a locking system that can get the perfect shape with soldering and screw-type connections.
An interlocking connector connects the speakers to amplifiers with greater current capacities and safety ratings than previous types. The connector has come to represent the industry standard. Its unique configuration allows the speakon connector to snap into place with a twisting motion. This minimizes the chances of disconnection and electrical shock; a latch lock lever adds more security. The connector is fully shielded and does not short out during connection, as previous tip, ring, and sleeve (TRS) plugs can.
WIRING A SPEAKON CONNECTOR:
Designed primarily for high-current audio setup applications, the speakon connector is only compatible with similar plugs. This eliminates the risk of equipment miswiring. Components with the connector include connectors, couplers, adapters, and chassis mount units in pole configurations. They also facilitate color coding for immediate identification.
To have fun with your new amplifiers, it is essential to understand how to wire a Speakon connector. But before learning how to wire, it’s important to know that to start the installation of the speakon connector, as well as other electrical elements, it is necessary to cut off the electrical current. Failure to turn off power notes prior to installation could cause overloads or short circuits that could damage the installed speaker or power racks.
Step 1: Put the strain relief of the Speakon connector over the wire.
Step 2: Now strip the outer insulation of the wire using the wire stripper or cutters. You’ll require an inch of stripping. So, plan and mark it accordingly.
Step 3: Your wire will be exposed to the inner insulations now. In this cable, you’ll find two of them. Remove the insulation and twist the inner copper wires with your hand.
Step 4: This step is a bit tricky and requires you to understand the connection requirements you want in place. Stick your copper cables by white to 1+ and black to the 1- to connect your speaker to the amplifier. You might want to use it differently if you have some other usage under consideration.
Step 5: Tighten the screws of the wires. So the internal copper wires fit the connectors completely. Don’t push them too hard, as it might free the screws.
Step 6: Now, put the initial part of the strain relief up the wire towards the connector. It has notches that can fit the main part. You’ll have to adjust it properly to fit it in.
Step 7: The other part of the strain relief is the housing. Rotate it over the initial part to create a secure connection.
Your Speakon connector is ready to use. Test it using an ohmmeter and adjust accordingly.
