XLR connector: How to Use and Install
XLR is ideal for musical equipment and instruments
It often happens that an audio cable has different plugs at each end. And that's why this accessory can have more specific uses. To give you an idea, the cables with the XLR plug on one end and P10 or P2 on the other are used to connect the microphone on the soundboard.
The XLR cable, which has the same plug on both ends, can be used to connect equipment such as speakers, PA systems, and musical instruments equipped with an output or XLR input.
XLR Cable Details
Now the XLR cable has some details that are pretty cool, for example every XLR cable is balanced, which avoids interference and noise in the audio.
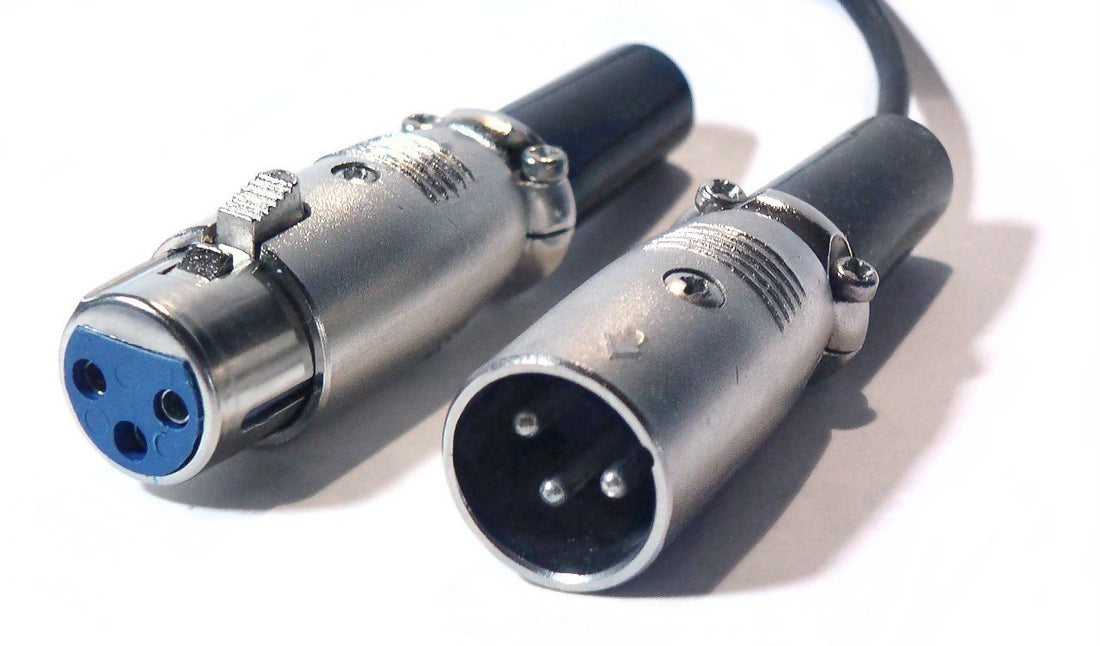
The plug of this analog cable can be male, so in this case it has the pin to fit. Also there is a female version, with space to fit the rods. Both are efficient in the same way and the difference is basically the way to fit!
Also, it's good to know that this plug usually has 3 external pins or spaces for 3 rods. But there are also models with 4, 5, 6 and 7 pins. Therefore, the tip to make the right choice is to pay attention to the equipment where you are going to use your cable.
Another detail is that you can choose an XLR cable with a lock on the plugs. That is, this type can make a difference by preventing the cable from coming loose from the device.
Cares for your cable
Having audio cable plugs in good condition is essential to make the connection between devices. So, the first step is to clean this accessory with a flannel dry to remove dust or grease after use.
And if you have thick dirt attached, the tip is to use the flannel moistened with a little water. Then it's good to pass the dry cloth to avoid leaving wet, after all, it can rust!
Now, if the plug has already become rusted, you can apply some abrasive polish. But remember that this kind of product cannot be used frequently.
In addition to the plugs, the protective cover of the audio cable's internal wires also deserves care, even because it is this cover that prevents them from bending and breaking. Cleaning can be done with dry flannel to remove dust and wet flannel for difficult dirt. Once cleaned, your cables will last most!
Get it right when installing and using
In addition, installing an audio cable is very simple, the cable usually comes with plugs at both ends and just connect them to the equipment you want to use. But there is one detail:As there are several types of cables, you have to make sure that the device has an input and
output to the audio cable!
Therefore, it can happen that an audio cable has two identical plugs, but it is also common to use cables with different plugs. An example of this is the P2 and P10 cable that connects
devices such as the MP3 player on the soundboard.
Remember that to make safe cable connections you have to use quality wire connectors that will keep your equipment safe from dust, water and other problems!

